keeb.io Iris
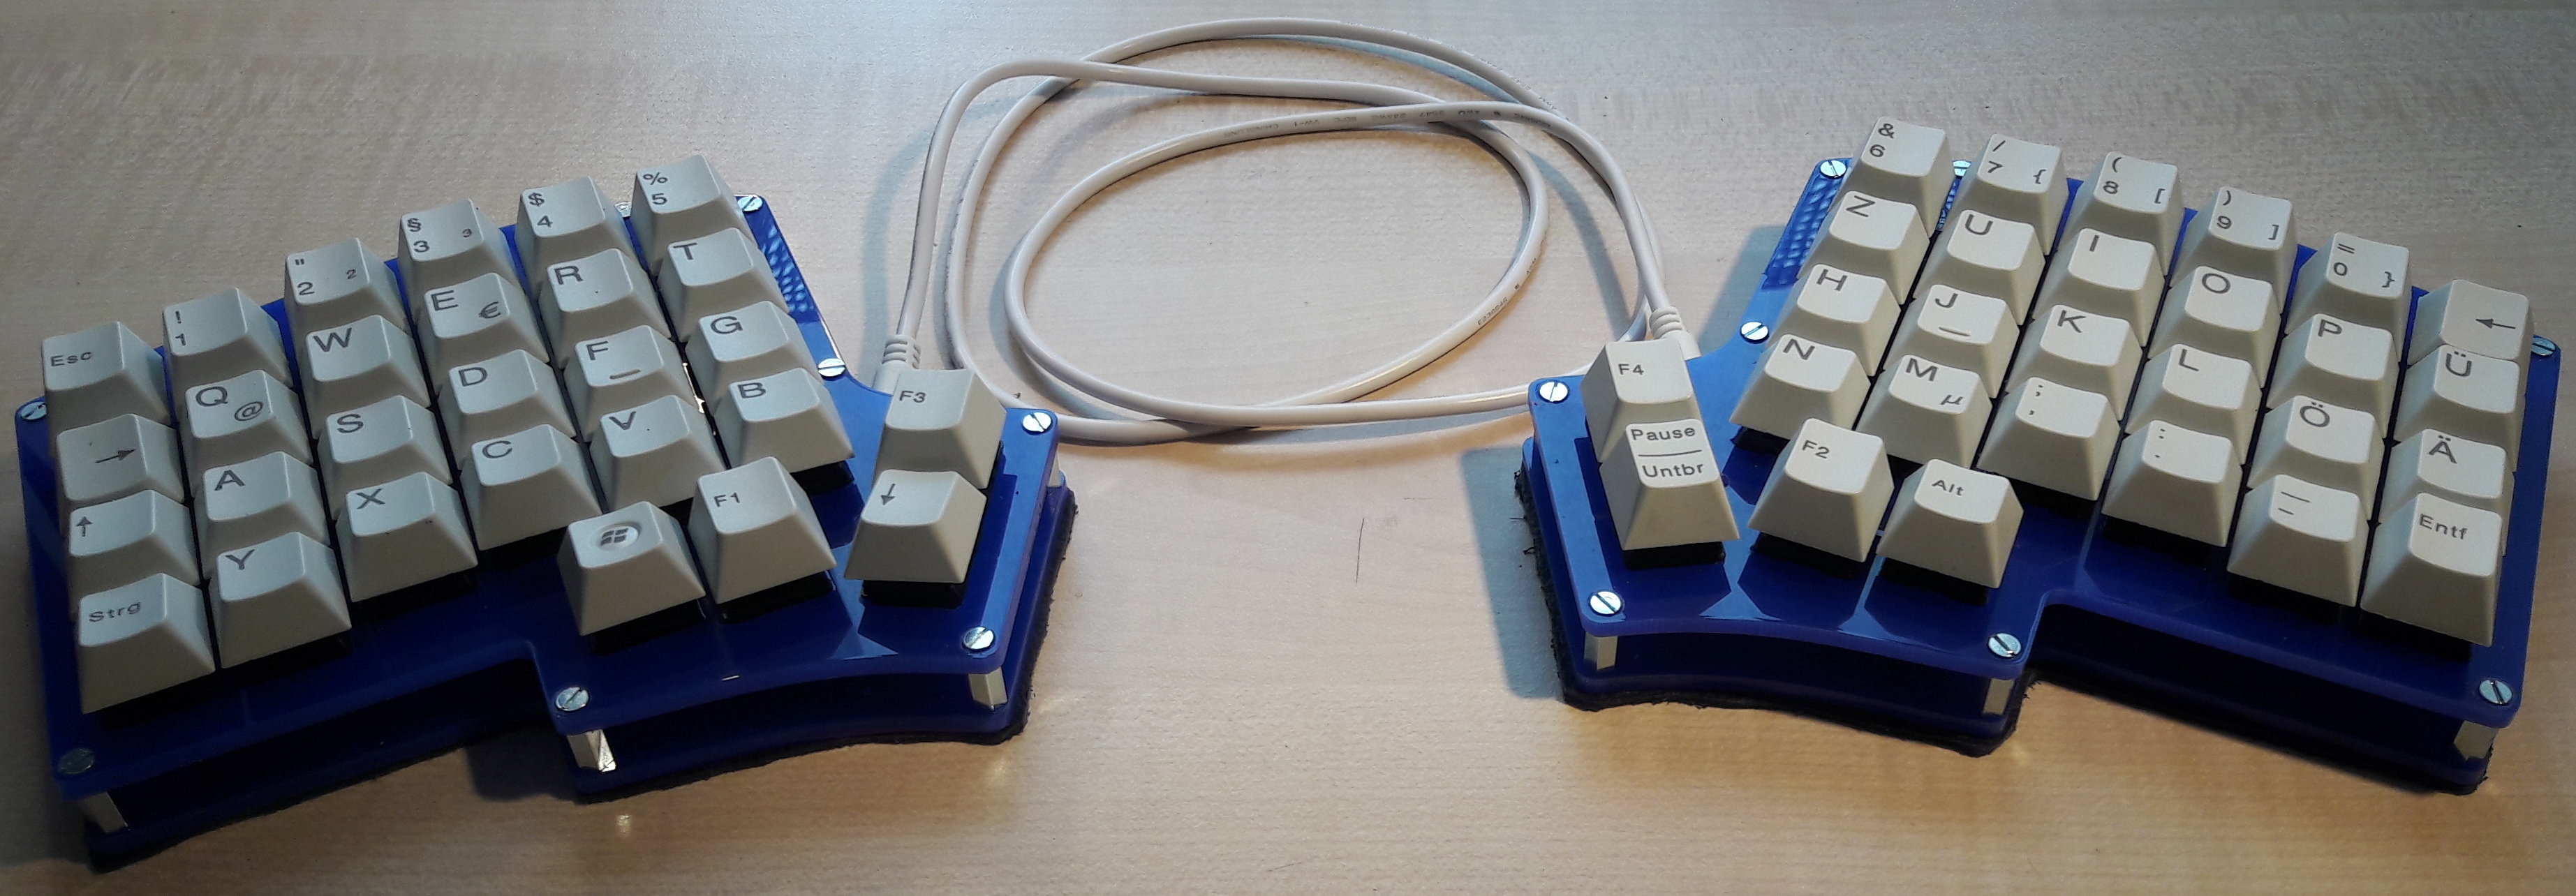
I built my own keyboard. It is an Iris from keeb.io. The Iris has a split 56-key ortholinear layout and it is fully programmable, running the QMK firmware.

Step 1: Choose wisely
Coming from the Kinesis Freestyle II, I wanted to go one step further and have all keys (especially the cursor keys) right at my fingertips, without the need to move my hands. And I wanted to have this luxury everywhere, therefor I looked for a fully programmable solution with split layout. The Iris provides both for a reasonable price, if you are able to use a soldering iron.
Step 2: Find all the parts
After deciding for a keyboard, the next step was to find all required parts. Keeb.io offers the PCBs, the micro controllers and the plates, but I wanted to order the least amount of parts from outside of Europe. I ended with the following sources:
- PCBs, diodes, 3,5mm sockets and reset switches, all in one kit from keeb.io
- switches and cables from reichelt.de
- micro controllers from Eckstein Komponente
- plates from sculpteo.com using the STL files from keeb.io
- screws and distance bolts from farnell.com
- key caps from a used keyboard that I got cheap from ebay
- a sheet of leather from the junk box
Step 3: Build it
Building the Iris was a piece of cake using the building instructions from keeb.io. It really worked like a charm and took less than one hour for the whole keyboard.
Step 4: Configure it
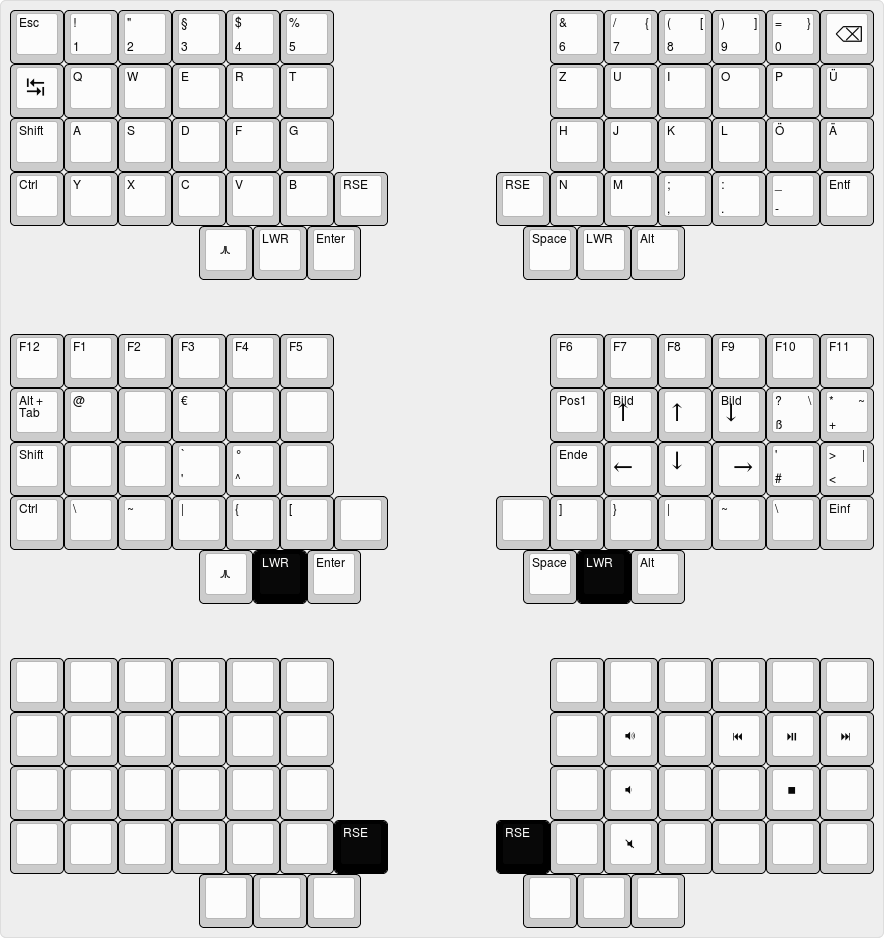
Going from 104 keys down to 56 requires a bit of thought about the layout of your new keyboard. The QMK firmware offers tremendous possibilities. There are already several layouts for the Iris available out of the box, but nothing that works well in the German typing context. So I started to define my own layout.
I just added one additional layer that contains all the keys missing in the default layer. This is mainly the function keys F1-F12 and everything that you need for writing source code - a great opportunity to put those characters into positions that are more convenient for my fingers than in the standard German layout. A third layer just contains some media control keys.

Building and flashing the QMK firmware is also straight forward, just follow the instructions.
Step 5: Profit
After a short period of complete confusion and dystypia I’m back to my old level of productivity. It is very convenient to have everything right at my fingertips while the wrists can stay where they are. The split layout also allows me to position the two keypads in the most comfortable ways! Now it is time to train my muscle memory and increase speed.